Setup
Using DHCP / DNS
If the USP Aero Platform system is set up in an environment with working DHCP and DNS services, the setup will be very straightforward:
- Insert the ISO-Image with the custom USP Aero Installer and boot the system with it

- After the initial Fedora CoreOS installation, the system will automatically download the USP Aero Base Image from the USP registry (on "uspregistry.azurecr.io") and install it.
- After a reboot, the first-time setup wizard UI will become available on all network interfaces.
Accessing the GUI / First Time Setup Wizard
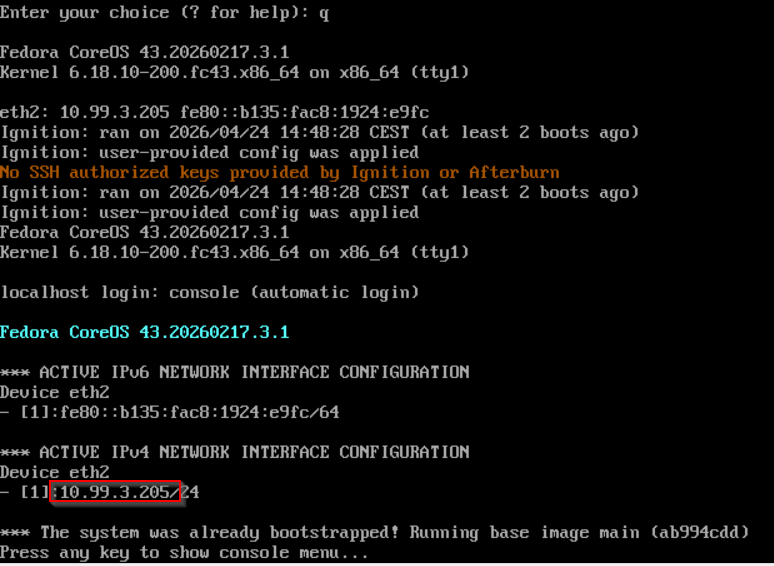
The IP address(es) where the UI is available after initial installation will be shown in the console window:
Without DHCP / DNS
If DNS and DHCP are not available (or not working correctly) in the installation environment, the system will not be able to automatically download the USP Aero Base image after the initial FCOS installation. In this case, it is necessary to manually configure the network settings through the console menu and manually trigger the bootstrapping process of the USP base platform:
- Insert the USP Aero Installer image and boot the system with it
- After the initial Fedora CoreOS installation, the console menu will be shown after a failed attempt to download the USP Aero base platform.
Now configure the network interfaces in the console menu.